Mastering Paint Brush Strokes for Professional Design Results
Integrating paint brush strokes into your digital workflow can transform a flat, sterile layout into something dynamic and tactile. Whether you are designing a streetwear collection, crafting a bold logo lockup, or creating social media content that demands attention, texture is the bridge between a generic image and a memorable brand asset. However, many creators stumble not because they lack creativity, but because they misunderstand the technical requirements of high-quality digital assets. Using low-resolution files or ignoring vector scalability often leads to pixelated prints and frustrated clients.
To help you avoid these common pitfalls, this guide breaks down what to look for in premium brush stroke bundles, how to apply them effectively, and why format matters more than you might think. By focusing on crisp, moody texture detail and print-ready specifications, you can ensure your designs hold up across every medium, from hoodies to album art.
The Resolution Trap: Why PPI Matters More Than You Think
One of the most frequent mistakes beginners make is downloading free or low-cost brush assets without checking their resolution. A paint brush stroke might look sharp on your monitor at 100% zoom, but once you scale it up for a poster or a full-front t-shirt print, the edges crumble into jagged pixels. This happens because many free resources are saved at web-standard 72 DPI (dots per inch), which is insufficient for professional printing.
The Fix: Always prioritize assets delivered in high-definition PPI (pixels per inch). For print-on-demand products like shirts, hats, mugs, and pillows, you need files that are at least 300 PPI at the intended print size. Premium bundles typically offer high-resolution PNGs that maintain crisp edges even when enlarged. If you are working on large-format posters, verify the dimensions before placing the asset. A blurry edge on a grunge texture screams "amateur" and can significantly lower the perceived value of your merchandise.
Vector vs. Raster: Choosing the Right Format for Scalability
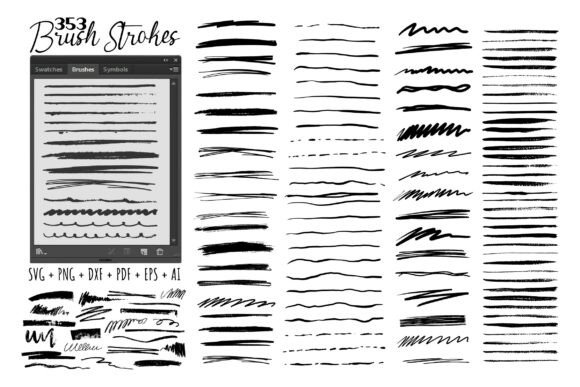
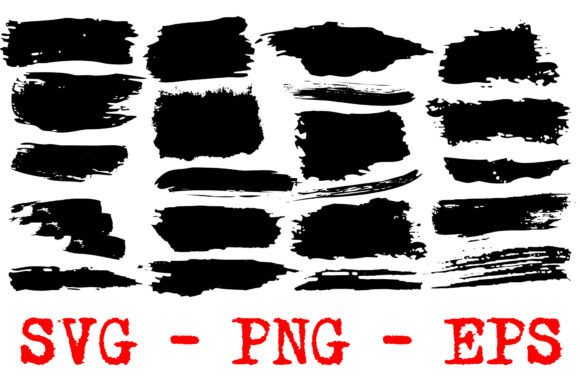
Another overlooked detail is the difference between raster (PNG/JPG) and vector (SVG/EPS/AI) formats. While high-resolution PNGs are excellent for complex textures with subtle opacity variations, they have a hard limit on scalability. Vector files, on the other hand, use mathematical paths to define shapes, meaning they can be scaled infinitely without losing quality.
Many designers assume that because a brush stroke looks organic and messy, it cannot be a vector. This is a misconception. Modern premium bundles often include scalable vector formats alongside high-res PNGs. Vectors are ideal for logo lockups where you might need to resize the graphic for a business card one day and a billboard the next.
- Use PNGs for: Complex ink smears, watercolor blends, and textures where transparency gradients are crucial for realism.
- Use Vectors for: Bold, high-contrast streaks, logo elements, and graphics that need to be resized frequently across different marketing materials.
By having both formats available, you gain the flexibility to choose the right tool for the job. If you only have raster files, you may find yourself unable to adapt a design for a new client request without recreating the asset from scratch.
Color Versatility: The Power of Solid Black Assets
A common inefficiency in design workflows is downloading multiple color variations of the same texture. You might see a bundle with red, blue, and green brush strokes and think it saves time. In reality, this limits your creative control. If your brand palette changes next season, those colored assets become useless.
The Better Approach: Choose assets that ship in solid black. A black paint brush stroke on a transparent background offers maximum versatility. In any design software, you can instantly recolor a black layer using blending modes, clipping masks, or simple hue/saturation adjustments. This allows you to match any brand palette or layout requirement instantly.
For example, if you are designing a dark-mode social media post, you can invert the black stroke to white or change it to a neon accent color with a single click. This non-destructive workflow saves hours of editing time and ensures consistency across your visual identity. It also makes it easier to experiment with different color combinations without needing to hunt for new assets.
Application Context: Matching Texture to Medium
Not all textures work for all mediums. A heavy, ink-heavy smear might look fantastic on a gritty concert poster but could disappear or look muddy when printed on a textured fabric like a canvas pillow or a heather-gray hoodie. Understanding how your brush strokes interact with the final product is key to professional results.
When designing for apparel, consider the contrast. Bold, high-contrast paint streaks work best on solid-colored garments. If you place a detailed, low-contrast texture on a patterned shirt, the design gets lost. For greeting cards or thank-you cards, finer details and moody textures can add a sense of luxury and personal touch, provided the print resolution is sharp enough to capture those nuances.
Here is a quick checklist for application:
- Streetwear Graphics: Go for aggressive, high-contrast strokes that stand out against dark fabrics.
- Logo Lockups: Use cleaner, defined edges to ensure legibility at small sizes.
- Social Content: Experiment with layered strokes to create depth and movement in static posts.
- Packaging: Ensure the texture complements the material finish (matte vs. gloss) to boost engagement and conversions.
Evaluating Quality Before You Buy
Before downloading or purchasing a bundle, take a moment to evaluate the asset quality. Look for previews that show close-ups of the edges. Are they crisp, or do they look anti-aliased to the point of blurriness? Do the ink smears have natural variation in opacity, or do they look like flat shapes?
Professional paint brush strokes should have a balance of roughness and definition. Too much noise can make the design look dirty; too little makes it look artificial. High-quality bundles will provide examples of the assets in use—on shirts, mugs, and posters—so you can gauge how they perform in real-world scenarios.
Additionally, check the license terms. If you are an entrepreneur or freelancer selling designs to clients, ensure the bundle includes commercial usage rights. Nothing disrupts a project like discovering you cannot legally use your chosen texture on a product you intend to sell.
Final Thoughts on Enhancing Your Design Workflow
Incorporating paint brush strokes into your design toolkit is about more than just adding flair; it is about adding intentionality. By choosing high-resolution, versatile assets and understanding how to manipulate them across different formats and mediums, you elevate the quality of your work. Avoid the temptation of quick, low-quality fixes. Instead, invest in premium bundles that offer solid black vectors and high-definition PNGs. This approach ensures that whether you are creating album art, packaging, or social media graphics, your textures will enhance rather than detract from your message. With the right assets, you can create bold, engaging visuals that resonate with your audience and stand the test of time.