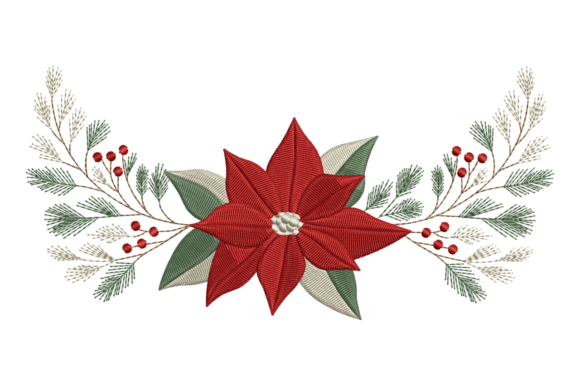
Christmas Poinsettia and Pine: Elevating Your Holiday Embroidery Projects
The holiday season brings a unique pressure for creators. Whether you are running a small Etsy shop, designing custom gifts for family, or simply enjoying a quiet evening with your sewing machine, the demand for high-quality, festive designs is immense. Among the most iconic symbols of this season is the Christmas Poinsettia and Pine. This classic combination offers a timeless aesthetic that resonates with customers and recipients alike. However, simply downloading a design and hitting "start" on your machine is rarely enough to guarantee professional results. Many enthusiasts overlook critical details in file selection, stabilization, and thread choice, leading to frustrated projects and wasted materials.
Understanding the nuances of this specific motif can transform your crafting experience. The poinsettia, with its broad, star-shaped leaves, paired with the textured detail of pine needles, creates a visual contrast that is both elegant and traditional. When executed correctly, this design adds significant value to t-shirts, tote bags, and home decor. Yet, the difference between a amateur-looking stitch-out and a polished masterpiece often lies in the preparation and the technical understanding of the design itself.
Common Pitfalls in Design Selection and Preparation
One of the most frequent mistakes makers encounter is assuming that all embroidery files are created equal. When you search for a Christmas Poinsettia and Pine pattern, you will find thousands of options. The error lies in choosing a design based solely on the preview image without considering the underlying stitch data. A design that looks vibrant on a screen may be overly dense, causing fabric puckering, or too sparse, leaving gaps that look unfinished.
For instance, beginners often select designs with high stitch counts for lightweight fabrics like cotton t-shirts. This mismatch leads to distortion. The heavy accumulation of threads pulls the fabric, ruining the garment's drape and comfort. Conversely, using a low-density design on a thick towel might result in the background fabric showing through the stitches, diminishing the visual impact. To avoid this, always check the stitch count and dimensions provided in the product description. A good rule of thumb is to match the density of the design to the weight of your fabric. If you are working with delicate materials, look for designs specifically labeled as "lightweight" or "redwork" styles, which use fewer stitches while maintaining clarity.
Another overlooked detail is the format compatibility. While most modern machines read common formats like PES, DST, or JEF, not all conversions are perfect. Automated conversions can sometimes alter stitch angles or trim commands, leading to thread breaks or messy backsides. It is crucial to verify that the seller provides native files for your specific machine brand whenever possible. If you must use a converted file, always run a test stitch-out on a scrap piece of the same fabric before committing to your final project.
Stabilization and Hooping: The Foundation of Quality
Even the best Christmas Poinsettia and Pine design will fail if the stabilization is incorrect. This is where many hobbyists lose confidence, blaming the design or their machine when the real issue is support. Poinsettias often feature satin stitches or fill patterns that require substantial support to prevent shifting. Using only tear-away stabilizer on stretchy knit fabrics, such as those used for holiday t-shirts, is a recipe for disaster. The fabric will shift during stitching, resulting in misaligned elements and uneven edges.
A better approach is to use a cut-away stabilizer for knits. Cut-away provides permanent support that moves with the fabric, ensuring the design remains intact after washing and wearing. For woven fabrics like canvas tote bags or linen napkins, a medium-weight tear-away is usually sufficient, but adding a top stabilizer or water-soluble film can help manage complex textures like pine needles. These fine details can easily get lost or tangled if the fabric surface is not perfectly smooth.
Hooping technique also plays a vital role. Many users hoop their fabric too tightly, causing "hoop burn" or permanent marks on delicate materials. Alternatively, hooping too loosely allows the fabric to slip. The goal is to drum-tight tension without distorting the weave. For difficult-to-hoop items like finished tote bags or thick jackets, consider using magnetic hoops or floating techniques with adhesive stabilizers. This method allows you to secure the stabilizer in the hoop and then place the item on top, reducing stress on the garment and ensuring precise placement of your festive motif.
Thread Choice and Color Theory
The visual appeal of a Christmas Poinsettia and Pine design relies heavily on color contrast and thread quality. A common mistake is using cheap, brittle thread that breaks frequently or fades after washing. High-quality polyester or rayon threads not only stitch out smoother but also provide the sheen that makes holiday designs pop. Rayon offers a luxurious luster ideal for decorative pieces, while polyester provides durability and colorfastness, making it better for items that will be washed frequently, like kitchen towels or children’s clothing.
Color selection should also be strategic. Traditional red and green are obvious choices, but they can look flat if the shades are too similar in value. To create depth, choose a deep, rich red for the poinsettia bracts and a darker forest green for the pine, perhaps adding a lighter green or gold for highlights. Some designers overlook the importance of underlay stitches, which anchor the top threads. If your design allows, adjusting the underlay color to match the top thread can prevent any underlying fabric color from peeking through, ensuring a clean, professional finish.
Maximizing Versatility Across Projects
One of the greatest advantages of a well-digitized Christmas Poinsettia and Pine file is its versatility. However, creators often limit themselves to standard applications. Consider scaling the design appropriately for different items. A large, detailed version works beautifully on throw pillows or wall hangings, while a smaller, simplified version is perfect for monogramming initials on napkins or adding a subtle touch to cufflinks and hats. Always resize within the recommended limits—usually no more than 10-15%—to avoid distorting the stitch density.
For entrepreneurs and small business owners, offering customization is key. This design pairs exceptionally well with text. Adding a family name or a short holiday greeting below the floral element can increase the perceived value of the item. Ensure there is adequate spacing between the graphic and the text to maintain readability and aesthetic balance. Test different font styles; script fonts add elegance, while block fonts offer a modern, clean look.
Final Checks Before You Stitch
Before you begin your final project, take a moment to review your setup. Check your needle; a fresh, sharp needle appropriate for your fabric type prevents skipped stitches and snags. Ensure your bobbin tension is balanced, as improper tension can cause loops on the back or pull the top thread underneath. Finally, verify your file path and design orientation on your machine’s screen. A mirrored design is a heartbreaking error to discover after an hour of stitching.
By paying attention to these details—file selection, stabilization, thread quality, and machine setup—you can ensure that your Christmas Poinsettia and Pine projects are not just completed, but celebrated. This design offers a wonderful opportunity to showcase your skills and spread holiday cheer. With careful planning and a focus on quality, you can create items that stand out for their professionalism and charm, whether they are destined for sale or given as heartfelt gifts. Embrace the learning process, test your methods, and enjoy the creative satisfaction that comes from mastering this festive classic.